Monday, November 29, 2010

Check Out Porter-Cable BN200B 5/8-Inch to 2-Inch 18-Gauge Brad Nailer for $88.50

Porter-Cable BN200B 5/8-Inch to 2-Inch 18-Gauge Brad Nailer Review


Porter-Cable BN200B 5/8-Inch to 2-Inch 18-Gauge Brad Nailer Feature


  • Long life maintenance-free motor to keep from staining the work surface
  • Internal piston catch for consistent max power on every shot
  • Rear exhaust to keep contaminants away from work
  • Drives 18 ga. nails from 5/8-inch to 2-inch length; Tool-free depth-of-drive adjustment with detents for proper setting of nail heads
  • Measures 9-3/4by10.4 inches; weighs 2.6 pounds


Porter-Cable BN200B 5/8-Inch to 2-Inch 18-Gauge Brad Nailer Overview


The Porter-Cable BN200B 5/8-to-2-inch 18-gauge Brad Nailer comes with a maintenance-free motor for added reliability and long tool life. With the ability to drive 5/8-to-2-inch 18-gauge nails, this brad nailer features an internal piston catch for consistent maximum power on every shot and a rear exhaust to keep debris away from the work piece. Also included is a tool-free depth-of-drive adjustment with detents for proper setting of nail heads, a tool-free jam release mechanism for easy nail removal, and a sequential style trigger with a lock off switch. Other features include a contact safety located behind the driver guide for better visibility, an adjustable belt hook, an integrated rubber grip for improved comfort, and a low nail reload indicator. With a 100-nail magazine, this nailer operates at 70-to-120 PSI for added versatility. Its strong and lightweight die-cast aluminum body measures 9-3/4 x 10.4 inches and weighs 2.6 pounds.


Available at Amazon Check Price Now!


Related Products


Customer Reviews


*** Product Information and Prices Stored: Nov 29, 2010 02:16:33

Visit : Here is the ozone-free ionizer with active purific reviews about core aerator and cutco knife set

Thursday, November 25, 2010

JONAS Episode 5 Division 2

Episode 5 is here! (Taxi) taxi's it! Thanx-Joe (driver pays and leaves) Driver (dial a number) and 'at home Demis! (Hangs up) (Demis goes to the door) (closed loops) Joe demi-hello? (It breaks the glass door with his arm) (walks) Demi? (Looks around) (looks like a pink note and hear someone read the note hidden feet) Voice-OMG demi demi are you here? Joe-Selena? Selena OMG, "Where is Joe demi? Joe-The main board? (Demi tied to a chair) Demi-hello? (Vertigo)-codyhello demi? Demi-what, what you want from me? Cody-I loved Demi ... And she pushed me away like I was garbage ... For whom? (He throws the magazine on the cover of Demis round Joe and Demi are kissing) Some pop star! Demi-What are you talking about? Im not with Joe? Cody (laughs) (establishing a knife in his neck) Do you really think I believe! Demi-cody please! (Moving away from demi) Cody wait ill-joe come to us, you can die .. Demi-cody NO! (A shot is fired Cody fallsEarth) Jessie Demi? Omg im so glad your here ... Jessie (the gun at demi) Demi-what are you doing? Jessie-Joe has something that I wannt and now I have somthing .. Demi-I trusted you ... You Basterd Jessie-Shutup .. ! Miley-so if we go out, we have a date! Nick-yeah! (Smiles) Kevin sr-where is Joe? Kevin-uh, he went to buy a present, said it was not me kev Kevin sr-Nick? Where is Joe? Kevin-ok good ... hes by Kevin sr-woYour ...

Friends Link : Here is the ozone-free ionizer with active purific find more save about blower reviews about core aerator and cutco knife set find more about mustache trimmer , cast iron skillet and Dehumidifier

Tuesday, November 23, 2010

How to Use a Cordless Nailer: Cordless Nailer If a use

Learning to use a cordless nailer for home improvement project in this free video electric tools. Expert: Matthew Christian Bio: Matthew Christian is a certified building contractor in Florida with expertise in real estate, renovation and landscaping. She has a degree in electronics filmmakers: Adolph Ramirez

Recommend : Here is the ozone-free ionizer with active purific reviews about core aerator and cutco knife set

Friday, November 19, 2010

Different types of nailers

Nagler are not your usual tools of power and not a general, not general-purpose tool available. There are many different types, brands and trademarks, and each type is designed for a particular purpose. Some are thinner, lighter materials meaning, while others are intended to denser, heavier materials. Here are reviews of some of the most common types of nailers.

Framing nail guns - is to bring big box nails, which are about 1 "-4" in size. These instruments are designed primarily for the nailsthick, dense materials. They tend to stick to type and also quite large and heavy.

Covers - Covers are a great example of tools designed for one purpose. These tools are special nails for the purpose of roofing and roof only. You can use a large number of nails in a time and usually type coil.

Siding Nailer - Nailers slides are also highly specialized tools and are constructed for connection to nail down. They have a greatMagazine is to wear specially for siding nails. These tend to be of a coil.

Nagler - These products are also known as Brad and / or PIN-Tools. They are intended, as its name suggests, rework, and so the nails are usually much smaller and smoother. They are usually stick-type nailers and are used to smooth finishes such as bells and whistles. They are usually much smaller and lighter Framer Nailer and are intended for lighter materials and smaller. The nails onThese devices are often rounded and skilled so that they can be hidden with filler.

pneumatic tools - pneumatic tools are a general category-oriented division of the devices are driven along the road of nails. pneumatic tools pneumatic nail through pressure or air. This can be very effective and are usually used for high precision there.

Type Nailer - Coil Nailer Coil type used (soft) instead of air pressure on the nails to be delivered. These will be usedProfessionals who use the facility all day without tiring your muscles need. This may also contain t more nails or screws with each load.

Palm Nailer - As the name suggests, are palm nailer fits in the palm of your hand and designed for use in tight corners where you can not play a musical instrument in its own right. These come in especially useful when working in areas such as wall to wall or ceiling Jost.

Headless pin - that are designed for the more sensitivework and high precision. They are mostly artisans, the creation of handmade objects are used and are sensitive fasteners used to hold the pieces together. These devices use fasteners / nails that are not head and can be easily hidden. Moreover, making the entrance very small nail marks that can be easily hidden.

Slipper - These are for very thin as tissue. Use ring-type fasteners and non-structural purposes in the first place.

My Links : Here is the ozone-free ionizer with active purific reviews about core aerator and cutco knife set more reviews about magnetic knife holder and knife sharpener

Wednesday, November 17, 2010

Great Price Ridgid for $166.99

Factory-Reconditioned Ridgid ZRR350RHA 3-1/2-in Round Head Framing Nailer Review


Factory-Reconditioned Ridgid ZRR350RHA 3-1/2-in Round Head Framing Nailer Feature


  • Powerful motor is able to drive 3-1/2-in long, 0.162-in diameter, nails. 16D Common
  • Rear loading magazine with by-pass pusher for quick 2-step reloading
  • Magazine adjustment for larger diameter nails
  • Dry-fire lockout feature extends motor life and prevents missing nails
  • Aggressive "toe-nailing" claw reduces slipping during angled nailing


Factory-Reconditioned Ridgid ZRR350RHA 3-1/2-in Round Head Framing Nailer Overview


This is a factory reconditioned power framing nailer. Reconditioned generally means that the power framing nailer has been returned to the manufacturer, who brings the power framing nailer back to like new condition. Some power framing nailers may contain cosmetic blemishes. Includes 3-1/2-in Round Head Framing Nailer - ZRR350RHA, Wrench, Eye Protection, Oil, Carrying Bag With Shoulder Strap


Available at Amazon Check Price Now!


Related Products


Customer Reviews


*** Product Information and Prices Stored: Nov 17, 2010 14:20:23

My Links : Here is the ozone-free ionizer with active purific reviews about core aerator and cutco knife set

Saturday, November 13, 2010

The three main tools for a sprinkler Fire Fitter

individual instruments are needed for any business professional in the world. Sprinkler fitters are no exception. You typically use a variety of instruments during a single day's work. The average employee would be pretty shocked to see how many instruments that we carry on our work truck. We use power tools, hand tools, and instruments of luck. Improper use of some of our instruments of power can critically injuring or killing a worker.

The most commonly used for a pipe fitter is the common lineKey. Keys to the steel tube was the first form of keys. Pipe fitter happy world is, as the producer finally designed in aluminum. The keys are new aluminum much easier. They are easier to transport and energy throughout the day of a worker so fewer disks. However, they are more expensive and subject to cracking.

When a new worker abuse in a series of aluminum-key, the foreman of construction usually make him or her wear steel wrenchfor several weeks. After steel key for two consecutive weeks, a new apprentice is very grateful to return to the aluminum ones. He will never abuse again. If longevity is a concern, then buy a steel key, because they are much harder than aluminum.

The most commonly used by a licensed sprinkler is a set of pliers. Here you can always Chuck stuffed in his pants pocket. In particular, we have a model called "male and female."

pipe fitters inSouthern CA location for a brand by far all others. The tool I prefer to sign a blue handle and lock is made of the channel. This particular brand of a strong balance sheet and name of the job site. Mechanics at work often say, "Where are my channel locks is a simple solution, I give my channel locks?". Since I came to trade, I never heard the term used pliers. It 's always Channel Locks.

The reliability of the tools to block the channel has gained the trust of an entire regionWorkers and entrepreneurs. They might be expensive, but are simply worth the price. more expensive instruments are generally higher quality tools. Your employees they value. A tool that is easily worth its weight in gold is the trademark Channel Lock. With two sets is common for most assemblers.

Outside the hose clamps and keys, there is another tool that is needed for a sprinkler installer: The rigid tube 300. They now cost between $ 1,100 to $ 3,700 mark.Depending on the other accessories, the price may vary. Security is a prerequisite of the pedal, and the oiler is a necessity. Another great addition is a set of rollers. Make it easier for a solo work on the machine to carry. Without wheels, it will be difficult to move the machine to a new location.

These are serious machines that I have ever used. The engine uses a single, low speed. He runs forward and in reverse order. It 's almost impossible to turn off'Machine from one direction to another in a flash. There is a mechanism that prevents this. If one of the front, without the machine has completely stopped contrary dangerous and potentially damage the engine.

Rigidity is a speed motor runs with a pair of extremely powerful. It 's always advisable to never loose clothing when using this machine. The rigidity of the machine 300 is a potentially lethal, especially in the hands of a beginner. L 'car engine is so powerful that it easily rip an arm or a leg. To avoid possible injury or death, the rigidity of the machine developed to require a properly installed the foot pedal to work. It will not work if the worker's foot on the pedal. To turn off the machine in case of emergency, all you need to remove a worker's foot off the pedal.

These three instruments will always be fitter near an irrigation system. These tools aredaily productivity of sprinkler fitter individual. They are definitely the "tools" for each technician.

Friends Link : Here is the ozone-free ionizer with active purific reviews about core aerator and cutco knife set find more about mustache trimmer , cast iron skillet and Dehumidifier

Thursday, November 11, 2010

Home Improvement Project and bells

Many people feel the need of a bell. Maybe you're more of a front door or maybe just a lot of people suddenly over. Do you remember that the bell can be a great way to improve your home, but it is also one of the easiest DIY projects you can take. They want to keep in mind that many of the electrical projects that you take home will be difficult and need to be a professional, butable, sitting in a doorbell

If you think that bell is a crazy idea that you can install one, then you have no idea of the wireless models. It 's the easiest way to install the bell and is the fastest way. You will find that these models are simply foolproof. You will find that the wireless doorbell receiver to send a signal to the bell, and it will. It 's a bit more technical then, but that seems to be thebe easily explained.

When it comes to the benefits of a wireless doorbell is that you will be able to purchase equipment in more than one bell, and then program them on the same key. You will be able to hear the bells throughout the house. There you will find that it is better because it is in the race even if they are on.

Another big advantage is that it requires nothing more than a small battery. Worryconnecting or working with electrical wires. You must ensure you have a number of banks in order to keep the door bell to conditions of constant work. You just have to remember to change batteries or rechargeable batteries, so as to reduce maintenance costs.

You will also find that you choose most of your time then takes the product to install. Many of the bells are made of brass or gold, and can be installedin a commercial break. They did not waste all your precious time to install a bell. With a few minutes to sit and relax.

Remember that the installation is as simple as a substitute. You will have no problems changing the unit to which all with just a couple of hand tools. You just need to use a screwdriver to release the first device and then use the screwdriver to replace the new device. You will find that there are a variety of ways in which wasteYour time, but put in a wireless doorbell system is not one of them.

Recommend : Here is the ozone-free ionizer with active purific find more save about blower more reviews about magnetic knife holder and knife sharpener reviews about core aerator and cutco knife set

Tuesday, November 9, 2010

Halloween traditions

With the growing popularity of Halloween, many families their holiday traditions. I wanted to share with you a tradition that she's one of my neighbors in our neighborhood a couple of years I'm sure it has bin for years. It's called "ghosting" and I believe the children should take a shot! It begins during the first week of October is the time sufficient for the entire district to be "orphaned". Depending on the size of your neighborhoodfamily or a ghost or two. is as small as our neighborhood, I'll give you directions to "ghosting", a house, but only twice, if you live in a neighborhood with homes of many.

Here's what you do:

On a simple sheet of white paper (8 ½ "x 11") draw a broad overview of a ghost in black permanent marker. Then you fill a goodie bag or brown paper bag with Halloween (candy, cookies, cookies, etc. ..). Print the following poem on a piece of paper and staplePicture in your mind. Keep your name on anything, because nobody knows who the ghost!

You've Been Ghosted!

Last night, we treat some, the tradition of fun, we hope to repeat.

Take the ghost and the pin for the door to let others know that no orphans.

Now it is your duty to convey the surprise of another family, it should be pointed.

Collect and provide them some parts soon, within two nights under the moonlight.

Includea ghost with each packet that is given to live with this poem for the tradition.

Give the bag of treatment, the poetry and spirit after sunset for your family by putting it in target near your porch, ringing the doorbell and run. We must not catch up! Remember, it's a surprise, and you do not want to know who "deserted" them. Then, turn the "spirit" of another family, and so on and so on and so forth. Do not be the first person in your family, friends or neighborsStart a new annual tradition. You have to start somewhere right? Why do not you? In five, ten, even twenty years down the road when you see someone you love from the same tradition for their loved ones will all be worth it.

Related : Here is the ozone-free ionizer with active purific find more save about blower find more about mustache trimmer , cast iron skillet and Dehumidifier more reviews about magnetic knife holder and knife sharpener

Sunday, November 7, 2010

Porter Cable Compressors

Porter-Cable Compressor, Porter Cable Corporation established. Although the Porter-Cable compressors, especially for homes / small businesses are used, the manufacturer provides a wide range of compressors, each with their own unique characteristics.

First, Porter-Cable compressors produce enough power to 0.8HP 7.5HP up. Most of the Porter-Cable compressors produce 1-2 hp.

What are the physical characteristics of the Porter-Cable compressors,all are equipped with a built-in tank red, and are equipped with wheels or additional frames to provide better mobility solutions. The smaller compressors do not occupy more volume of a mini-table, while the older ones the same size as a regular table or a medium sized refrigerator.

Another added feature of various Porter-Cable compressors, the greatest influence on the final size of the compressor, tank size, measured in gallons. The smallest containerSize is four gallons (~ 15.4 liters), while the largest is 80 liters (~ 302.9 liters). There are three main categories of size of the container. The first is from 4 to 6 gallons (~ 15.4 to 22.72 liters), the second 15-20 gallons (~ 56.79 to 75.72 liters) and the third from 60 to 80 gallons (~ 227 17 - 302.9 liters).

An important feature of Porter-Cable compressors, is if they are lubricated with oil or without oil. Although most of the Porter-Cable compressors, oil-free, those withthe highest capacity and performance. To be precise, all compressors with a capacity of more than 60 liters are lubricated with oil. compressors smaller tank both oil lubricated and oil-free models.

Finally, the compressors are used with standard equipment such as mobility kit, ASME safety valve, air regulator and gauges, manuals, photos (for greater mobility), and oil.

Visit : Here is the ozone-free ionizer with active purific find more about mustache trimmer , cast iron skillet and Dehumidifier

Friday, November 5, 2010

How to install a wood flooring panel with a nail-down method

There are a variety of methods for installing hardwood floors. The nail down technique of wood flooring, which has become very popular. For those who learn how to install hardwood floor, there is no easier or simply as a technique of nailing technique.

Unlike other methods that require the principle that you are an amateur or a professional carpenter, a carpenter, the nail down method, how to install parquet be done by anyone who can swing aHammer. Well, this is not all you need. You also need to be persistent, patient and willing to try new things, learning to install flooring. You must also be prepared for security, to read with the tools that we use.

Tools needed to learn how to install the panels, wood flooring

Broom and dust pan - you need to clean constantly, such as how to install hardwood floor, you get to make sure no dirt or other contaminantstrapped between the grooves or tables.

Carpenter's Crayon - Use these guidelines to create the background. You also need them for lines where you can cut wood panels drawn.

Claw Hammer - All areas near obstacles or walls, where you can not get enough room to swing a rubber mallet to get it with your hammer.

knife - this is often for unforeseeable are connected, as we learn how to install parquet. But the main purpose ofThis unit is to cut the excess wood, if the corrections of only a millimeter or two to do.

Drill and 3 / 32 "tip - you use this to your holes should be slightly smaller in length and girth of your nails drill as a result, your boards from cracking when you put the nails in them to prevent ..

Hardwood Flooring Nails (2 ") - These nails are important because they know what to think instead of your floor.

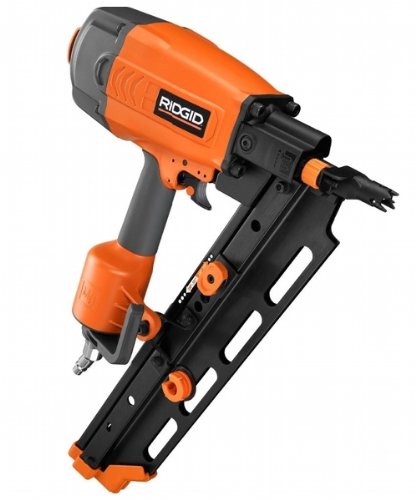
Nagler - This canor a pneumatic hammer or nail gun to be. The pneumatic nail gun is naturally faster and easier, but you only do that properly calibrated so that the nails do not go too far from the forest and destroy the wooden panels.

Rubber Mallet - This is your chance to hit your frustration as you learn to install flooring. In fact, you should carefully to fly on the surfaces of two plates put together perfectly. You do not want them too far or yourCracks in the ground. But if you pound them too together, they can damage or even force them to fold.

Saw - the end of each row of panels as you go into a corner, it is necessary to meet your cutting boards. Any windows in the room will also be cut around.

Preparation for installation of panels for wood floors

Although nailing the method for installing parquet panels is simple, it should nevertheless be carefully implementedas the floor for many years, in any form go completely.

All furniture and obstacles can be removed from the room must be removed when you install your floor panels. This is true even if it requires manual removal and installation. For such buildings, fixtures on the floor of the room, you just have to drive around them. Not the easiest way to go, but you do what you do to install your floor. If youhave thresholds of doors, antique wood flooring, baseboards, or carpet, remove it before you start.

If the area where the floor should be concrete or other solid material, a coating used to feel the ground cover that area. Then set up a base of plywood on it. Once installed, you should be ready to install the floor.

Steps on how to fix the wooden floor panels

1. Place your first plate in the bottom of the room in whichdecided to start your floor. The furrows should be against the wall and the languages in the direction of the room.

2. Get Started plates to make a line. The last panel does not fit quite right, so you must use the carpenters crayon to mark where to cut. Use your circular saw to cut. Be very careful not to cut too small. The device should be almost perfect.

3. Use the drill to make your small holes. Place the nails attached to the bottom down. Althoughwill last longer, you will be thankful when you're finished, if the holes in which one learns to use the installation parquet.

4. Take the other half of the panel that stops the line you just ended and as a starting point for the next line. This seems strange at first, but if the floor is finished, the look of the panels are very well compensated. Moreover, if all the units to vote, the land is not the strength of teeth.

5. Continue in this mannerIt passes through the remaining lines. Use the rubber mallet necessary for the tables and rows nice and cozy. If you do not mount the rubber hammer, use a hammer, tighten the boards. The last things that you need some big gaps between the boards when you finish your new floor.

6. The last panel, the look is harder to get into law, but the floor really hurt if you hurry in this step. You must measure and cut the patient, and make your lastPanel fit.

7. Clean the floor down.

Clean, when laying a wooden floor panels

In the process, such as wood flooring installation, cleanliness is important and neglected enough to warrant its own section of the follow-up. But unlike other guides embarrassed method for nailed parquet panels, we want to ensure that you understand this step.

Cleanliness is important because there are small wood splinters and sawdust everywhere after the typicalWood floor installation. Use your broom and shovel to collect the debris on the floor. These particles, if not for the man and rubbed with furniture, your new floor looks like a scratched old floor to make fast enough.

If you do not have the instructions to install wood floors and glue used on your wood paneling is gone, there's no need to wet the floor before it is to solve a case. This is because we do not want to swell, until you have moved theFurniture back, and there were a couple of days to reach its final settlement.

Special add-on tips on how to fix the wooden floor panels

Do not be too aggressive when you create the plan, however. It 's very easy on the surface of the floor panels when they are free floating and place and hammered them to ruin. Pay special attention when setting a line that seems a bit 'out.

If the rubber mallet is quite robust, it will be the best thingNails because they do not move as much damage on the surface of the floor panels.

Your soil nailed probably will not be as nice as installed by a professional. On the other hand, you will see pretty much alone. It is likely the best job search for a flooring installer can not be inexperienced. And to make you change your mind on the ground, is one of the easiest ways to install floors reversed.

But apart from that,nailed easy to install and uninstall, down the floor has several advantages over other types of use. The main advantage to keep in mind is that a sealant is rigid base, once a base plate is dried in place, it's there for good, it is easy to drive on the next or not. The loose soil is not connected to anything and can be creaky, dynamic and lively. So enjoy your new plan firmly in place.

Tags : Here is the ozone-free ionizer with active purific find more about mustache trimmer , cast iron skillet and Dehumidifier

Wednesday, November 3, 2010

Monday, November 1, 2010

Check Out Bostitch MIIIFN-KIT Floor Stapler to Floor Nailer Conversion Kit for $198.99

Bostitch MIIIFN-KIT Floor Stapler to Floor Nailer Conversion Kit Review


Should have been an easy install but the instructions are very poor.
Kit includes one special tool, instructions use two (one inch open end wrench will do fine for second tool).
Kit includes one allen wrench, you need three sizes.

On the bottom use the included allen wrench to remove the four screws that hold all the black parts to the gun.

On the top, pull the bumper off. Remove four screws and top.
Inside top remove three screws and and all the guts fall out.

Use the included tool and 1 inch open end wrench to expose retaining pin holding driver.
Install new driver, insert pin, use tool to cover it.
Change the gasket between the upper and lower guts. Look close, the old gasket is in there don't miss it.
Put the guts back in top and bottom and reconnect. (three screws)
Top (four screws).
Put back the bumper.
Install the big black assembly on the bottom.


Bostitch MIIIFN-KIT Floor Stapler to Floor Nailer Conversion Kit Feature


  • Convert MIIIFS into MIIIFN
  • Enables your flooring stapler to shoot flooring cleats
  • Less than half the price of buying a complete nailer
  • Tool Not Included


Available at Amazon Check Price Now!


Related Products


Customer Reviews


Nail converter - B. Korpi - Michigan, U.S.A.
This is the kit you need to convert the stapler to a nailer, very easy to change. The Bostitch nailer is a nice unit although it does not have th face nailing option for tight spots by the wall.


Received product Broken, trying to resolve with all spare tools. - Raymond Troppmann - Edmonton Canada
I'm still waiting to recieve this product, it has been over a month now. I've now recived the product and was totally damaged, I've sent a list of broken pieces to allsparestools, they responded that they would source and then send out the parts as soon as possible. That was on June 1st, I'm still waiting for parts or status update from them.


coversion kit - R. Jacques -
20 yrs flooring exp. product works great if you want to convert over to using cleats instead of staples.

*** Product Information and Prices Stored: Nov 01, 2010 11:45:14

Tags : Here is the ozone-free ionizer with active purific find more save about blower find more about mustache trimmer , cast iron skillet and Dehumidifier